Adorable little crochet bear
This is a crochet teddy bear pattern in plush yarn.
Happy crochet!
Crocheted Teddy Bear Pattern
★★★★★
It’s not the yarn I would have liked to buy, but unfortunately online a lot of things look different than in reality. I put it aside for several years, but now I needed the space and started to process my old yarn. It didn’t have a label, it wasn’t even buttoned up so I had strong doubts that it would be any good. Despite this, it was surprisingly easy to work with, no lint or tears, so I quickly crocheted this tiny teddy bear.
Please accept her pattern with love. Happy crochet!
Supplies:
- Plush yarn
- Crochet hook that matches the yarn of your choice
- Needle for sewing
- Scissors
- Two safety eyes
Stitches and abbreviations (US crochet terms):
- sc – single crochet
- dec -decrease
- inc – increase
- ch – chain
Tip
– If you also find it difficult to pull the magic ring together at the beginning of the round, make 3-4 ch and hook the 6 dc into it.
– When sewing, this type of thread often breaks on me, not to mention how hard it is to thread in the needle. If you struggle with this, use a cotton yarn of a similar colour to sew the body pieces together. But you can crochet the legs and arms right away, just follow the pattern instructions
Crocheted Teddy Bear Pattern
ARMS
Rd 1 – 6 sc in magic ring
Rd 2 – sc inc around (12)
Rd 3 – (1 sc, 1 inc) x6 (18)
Rd 4 – (1 sc, 1 dec) x6 (12) Stuff until this point
Rd 5 – (2 sc, sc dec) x3 (9)
Rd 6-17 – 9 sc
Flatten, then close with 4 sc. If you plan to sew the legs with this yarn, leave a long tail for sewing. You can also crochet them directly onto the body – you’ll see how when you get to the body part.
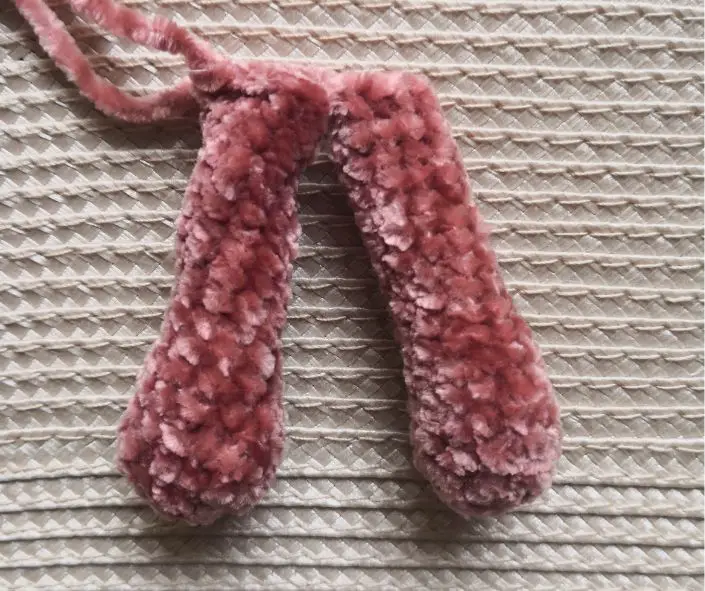
LEGS (2x)
Rd 1 – 6 sc in magic ring
Rd 2 – sc inc around (12)
Rd 3 – (1 sc, sc inc) x6 (18)
Rd 4 – (2 sc, sc inc) x6 (24)
Rd 5 – (3 sc, sc inc) x6 (30)
Rd 6-7 – 30 sc
Rd 8– 6 sc, (1 sc, sc dec) x6, 6 sc (24)
Rd 9 – 6 sc, 6 sc dec, 6 sc (18)
Rd 10-13 – 18 sc
Rd 14 – (1 sc, sc dec) x6 (12)
Stuff until this point.
Rd 15-18 – 12 sc
Flatten, then close the top with 6 sc. If you plan to sew the legs with this yarn, leave a long tail for sewing. You can also crochet them directly onto the body – you’ll see how when you get to the body part.
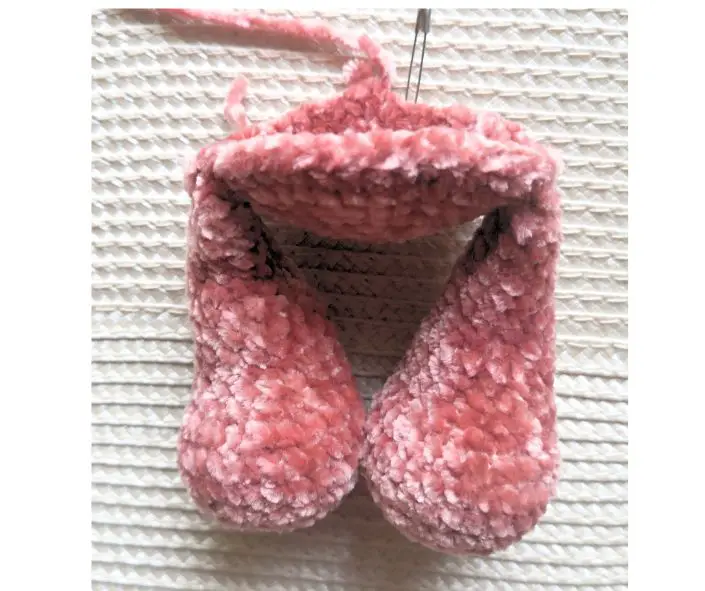
Body
Here I’m providing instructions where the legs and arms are crocheted directly into the body. If you prefer to sew them separately, you can disregard these instructions.
Rd 1 – 6 sc in magic ring
Rd 2 – sc inc around (12)
Rd 3 – (1 sc, sc inc) x6 (18)
Rd 4 – (2 sc, sc inc) x6 (24)
Rd 5 – (3 sc, sc inc) x6 (30)
Rd 6 – (4 sc, sc inc) x6 (36)
Rd 7 – (5 sc, sc inc) x6 (42)
Rd 8 – 8 sc, 6 sc with the back leg, 14 sc, 6 sc with the second leg, 8 sc (42)
Rd 9-12 – 42 sc
Rd 13 – 12 sc, (1 sc, sc dec) x6, 12 sc (36)
Rd 14-15 – 36 sc
Rd 16 – (4 sc, sc dec) x6 (30)
Rd 17-18 – 30 sc
Rd 19 – (3 sc, sc dec) x6 (24)
Rd 20 – 24 sc
Rd 21 – (2 sc, sc dec) x6 (18)
Rd 22 – 4 sc, 4 sc with the arm, 4 sc, 4 sc with the arm, 2 sc (18)
Rd 23-24 – 18 sc
Leave a long tail of yarn if you want to sew the head with it.
HEAD
Rd 1 – 6 sc in magic ring
Rd 2 – sc inc around (12)
Rd 3 – (1 sc, sc inc) x6 (18)
Rd 4 – (2 sc, sc inc) x6 (24)
Rd 5 – (3 sc, sc inc) x6 (30)
Rd 6 – (4 sc, sc inc) x6 (36)
Rd 7 – (5 sc, sc inc) x6 (42)
Rd 8-11 – 42 sc
Rd 12 – 9 sc, 3 sc inc (for the face), 18 sc, 3 sc inc (for the face), 9 sc (48)
Rd 13-17 – 48 sc
Rd 18 – (6 sc, sc dec) x6 (42)
Rd 19 – (5 sc, sc dec) x6 (36)
Rd 20 – (4 sc, sc dec) x6 (30)
Place safety eyes between rounds 11 and 12, with a distance of 7-8 sc between them. Pay attention to the positioning of the 3 increases on each side for the face and adjust the eye placement accordingly. Stuff the head.
Rd 21 – (3 sc, sc dec) x6 (24)
Rd 22 – (2 sc, sc dec) x6 (18), sl st
EARS (2x)
Rd 1 – 6 sc in magic ring
Rd 2 – sc inc around (12)
Rd 3 – (1 sc, sc inc) x6 (18)
Rd 4 -5– 18 sc
NOSE
Rd 1 – 6 sc in magic ring
Rd 2 – sc inc around (12)
Rd 3 – (1 sc, sc inc) x6 (18)
Rd 4 – 7 sc, incx2, 7 sc, incx2 (22)
Sew the bear’s ears and nose onto the head.
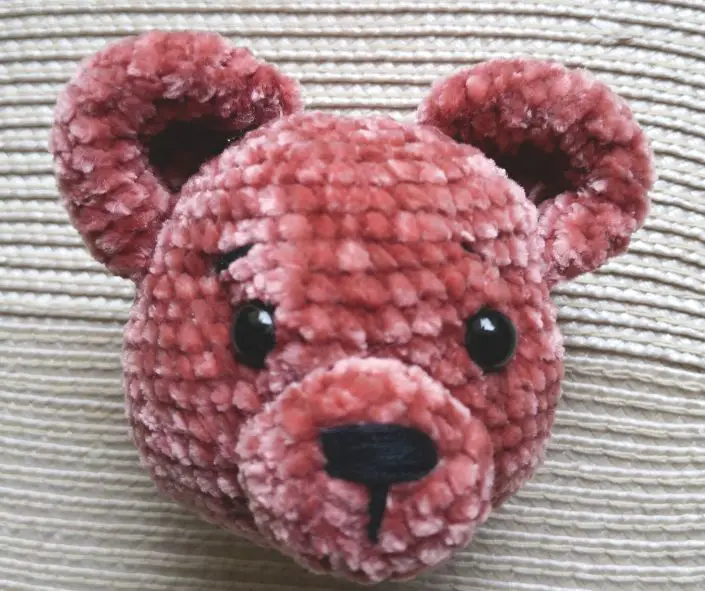
TAIL
Rd 1 – 6 sc in magic ring
Rd 2 – sc inc around (12)
Rd 3 – 12 sc
Rd 4 – (2 sc, dec) x3 (9)
Leave a long tail for sewing. Sew the tail to the body.
Your crochet teddy bear is ready!
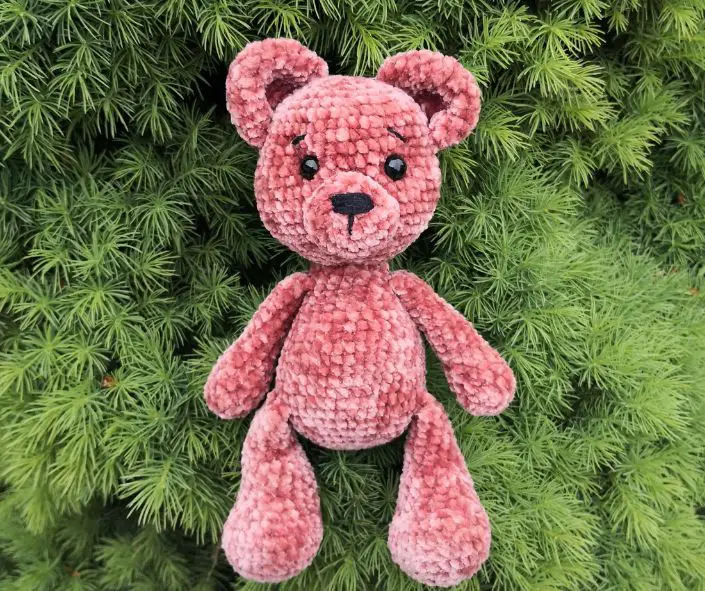
For more teddy bear patterns, check out the crochet bears album
