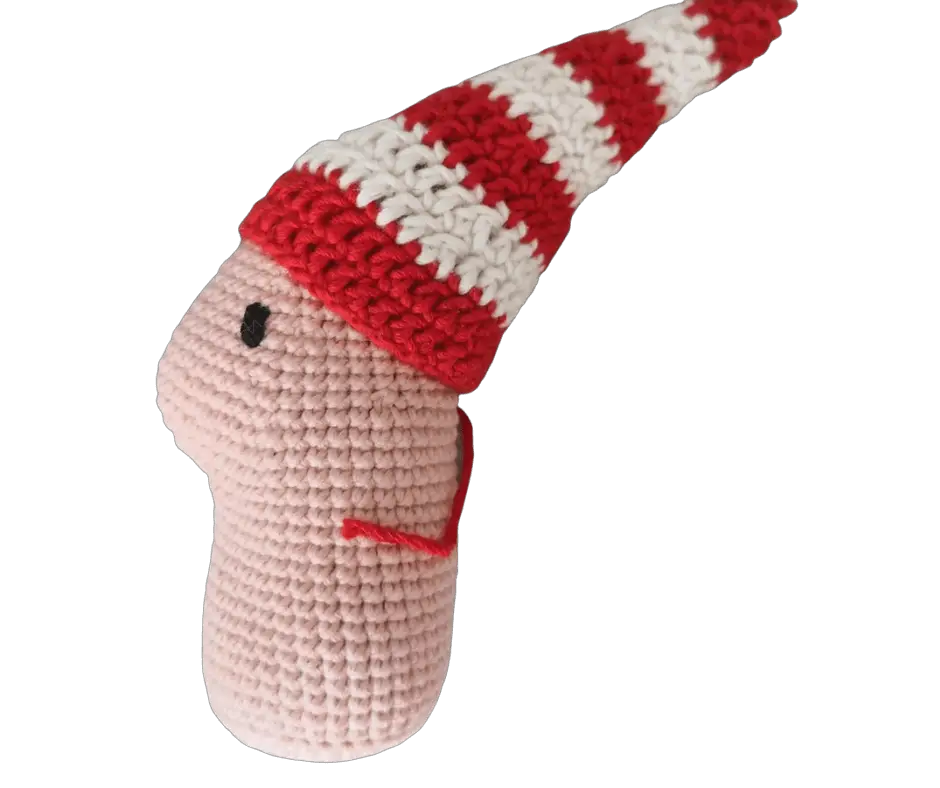
Elf’s Comfort Blanket – Part 2.
Materials
- Red, white, skin-colored yarn
- Black embroidery thread for shaping the eyes
- Needle, scissors for assembly
Head of the clown
You can find the first part of the comfort blanket, the star blanket, here.
- round – 6 sc into the magic ring
- round – 6 inc (12)
- round – (1 sc, 1 inc) x6 (18)
- round – (2 sc, 1 inc) x6 (24)
- round – (3 sc, 1 inc) x6 (30)
- round – (4 sc, 1 inc) x6 (36)
- round – working in back loops only: 36 sc. You will use the front loops later to attach it to the blanket. 8-19. round – 36 sc
- round – 18 sc, 3 ch, crochet 2 sc on the chain going backwards, 18 sc
- round – 18 sc, 4 dec, 18 sc (44)
- round – 21 sc, 2 dec, 21 sc (46)
- round – 21 sc, dec, 2 sc, dec, 21 sc (48)
- round – (10 sc, dec) x4 (44)
- round – 10 sc, dec, 20 sc, dec, 10 sc (42)
- round – 5 sc, dec, 18 sc, dec, 5 sc (40)
- round – (8 sc, dec) x4 (36) 28-29. round – 36 sc
- round – 7 sc, dec, 18 sc, dec, 7 sc (34)
- round – 34 sc
- round – (3 sc, dec) x2, 14 sc, (dec, 3 sc) x2 (30)
- round – (8 sc, dec) x3 (27)
- round – (7 sc, dec) x3 (24)
- round – (6 sc, dec) x3 (21)
- round – (5 sc, dec) x3 (18)
- round – (4 sc, dec) x3 (15)
- round – (1 sc, 1 dec) x5 (10)
- round – dec x5 (5) Thread the yarn through the front loops of the stitches, then pull to close. Sew the hole and fasten off the yarn. Embroider the eyes.

Hat
Measure the initial chain to the head. We’re going to sew it on at a slight tilt. I’ll describe how I made mine, but the starting number may not work for you. I crocheted dc throughout, changing colors every two rounds (as with the blanket). I closed the rounds with a sl st and started a new one with 3 ch. This way the color change is not visible. I don’t write this down for each round separately. I started with 33 ch
- round – 32 dc
- round – 32 dc – change color to white
- round – (6 dc, dec) x4 (28)
- round – (5 dc, dec)x4 (24) – change color to red
- round – 24 dc
- round – (4 dc, dec) x4 (20) – change color to white
- round – 20 dc
- round – (3 dc, dec) x4 (16) – change color to red
- round – 16 dc
- round – (2 dc, dec) x4 (12) – change color to white
- round – 12 dc
- round – (2 dc, dec) x3 (9) – change color to red
- round – 9 dc
- round – (1 dc, dec) x3 (6)
- round – 6 dc
- round – dec, then close off. Sew it to the head at a slight tilt.
Arms
We start with white color. I changed colors every 4 rounds, which seemed to me about as high as the color change on the blanket. I crocheted with sc because I stuffed the hand part up to about the first color change, which would be visible with dc.
- round – 6 sc into the magic ring
- round – inc in every stitch (12)
- round – (1 sc, 1 inc) x6 (18) 4-12. round – 18 sc
- round – dec, sc, dec, 7 sc, then color change in the last stitch (16) 14-17. round – 16 sc – change color to white 18-21. round – 16 sc – change color to red 22-25. round – 16 sc – change color to white 26-29. round – 16 sc – change color to red 30-33. round – 16 sc – change color to white 34-35. round – 16 sc
- round – (2 sc, dec) x4 (12)
- round – 12 sc
Sew the head to the center of the blanket, and the arms to the appropriate stripe in color.
Your nap blanket is now complete!
